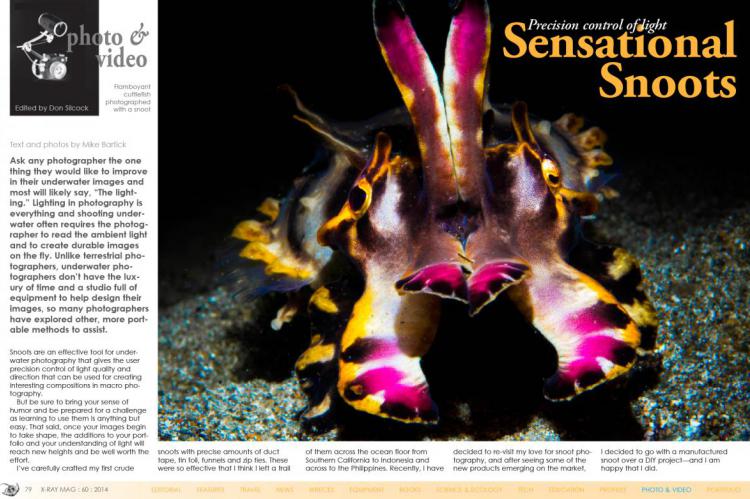
Precision control of light: Sensational Snoots
Ask any photographer the one thing they would like to improve in their underwater images and most will likely say, “The lighting.” Lighting in photography is everything and shooting underwater often requires the photographer to read the ambient light and to create durable images on the fly.
Tags & Taxonomy
Snoots are an effective tool for underwater photography that gives the user precision control of light quality and direction that can be used for creating interesting compositions in macro photography.
But be sure to bring your sense of humor and be prepared for a challenge as learning to use them is anything but easy. That said, once your images begin to take shape, the additions to your portfolio and your understanding of light will reach new heights and be well worth the effort.
I’ve carefully crafted my first crude snoots with precise amounts of duct tape, tin foil, funnels and zip ties. These were so effective that I think I left a trail of them across the ocean floor from Southern California to Indonesia and across to the Philippines. Recently, I have decided to re-visit my love for snoot photography, and after seeing some of the new products emerging on the market, I decided to go with a manufactured snoot over a DIY project—and I am happy that I did.
So what exactly is a snoot?
Well, it’s a device that fits over a strobe head that controls the direction and size of the strobe flash beam. The area of the beam is controlled by a variety of means depending on the brand of snoot and can range from a broad beam of light to a narrow more laser-like surgical tool.
Using a snoot will help you to create more dramatic compositions through lighting, cut down on backscatter and help you, the photographer, to totally control the direction of light and how the light source plays out in an image.
Often snoots are used off-camera, either handheld, pointed by an assistant or mounted on a tripod. While all of these options work, I personally like to mount the device on-camera and use a long articulating arm for greater reach and control from behind my camera, which enables me to limit the task load and allows for quick and accurate changes.
There are many different brands of snoots to choose from these days. My snoot of choice is the Reefnet Optical Snoot, which is basically an articulating arm with fiber-optic lines on the inside. The base plate fits tightly and is secured over the strobe head in a screw-down method, and doesn’t fall off when adjusted. The snoot base includes one arm but has dual bulkheads for two arms. Each of the arms includes two interchangeable tip sizes, which can be easily changed underwater.
The Reefnet device doesn’t have an aiming light to help find the subject, which makes it tough to learn, but as a benefit, your subject won’t turn its head away either.
I strongly recommend starting with the single arm and larger tip. Then, as your patience and skill levels develop, add the additional arm and try the smaller tips, because while the smaller snoot tip provides a tighter radius of light, it also increases the difficulty of using the device.
The flash beam is best controlled by the height of the tip in relation to the subject. The closer the optic tip is to the subject, the narrower and more intense is the beam, while elevating the tip from the subject broadens and softens the beam.
Technique
Shutter speeds, f-stops, lens choices and distance to the subject all come into play as the decisions on how to light your subjects will change the dynamics of each image. Pay close attention to the details as overexposing the highlights can happen easily when the tip and light source is close to your subject.
Techniques on how you use your snoot will develop with experience as each subject requires a different method for lighting. Your techniques will also develop around the lens selection and style of photos you’re creating.
Super-macro images tend to miss the point of snoot lighting but can benefit from the directional effect of an articulating snoot. When using a 100/105mm lens with a diopter, I like to use a more directional lighting affect by articulating the arm into a front lighting position, rather than standard top lighting. The front lighting plays well with a narrow depth of field created by using magnifiers and diopters, with the light precisely positioned to accentuate features and decrease shadows, rather than the standard overhead strobe flash.
The needlefinger shrimp (above) was shot by top lighting the subject, and while it works, I feel it doesn’t quite have the dramatic effect as a front lit image. Keep in mind that while using a snoot, sometimes it is more of what isn’t in the frame than what is. Lens selection is key in this aspect.
I prefer the 40-60mm macro range best as it allows a tight working distance and a better tonal quality of light since there is less water to shoot through, and it maintains the negative space that I’m after. The negative space is a key feature of using a snoot and should not be overlooked.
Special effects
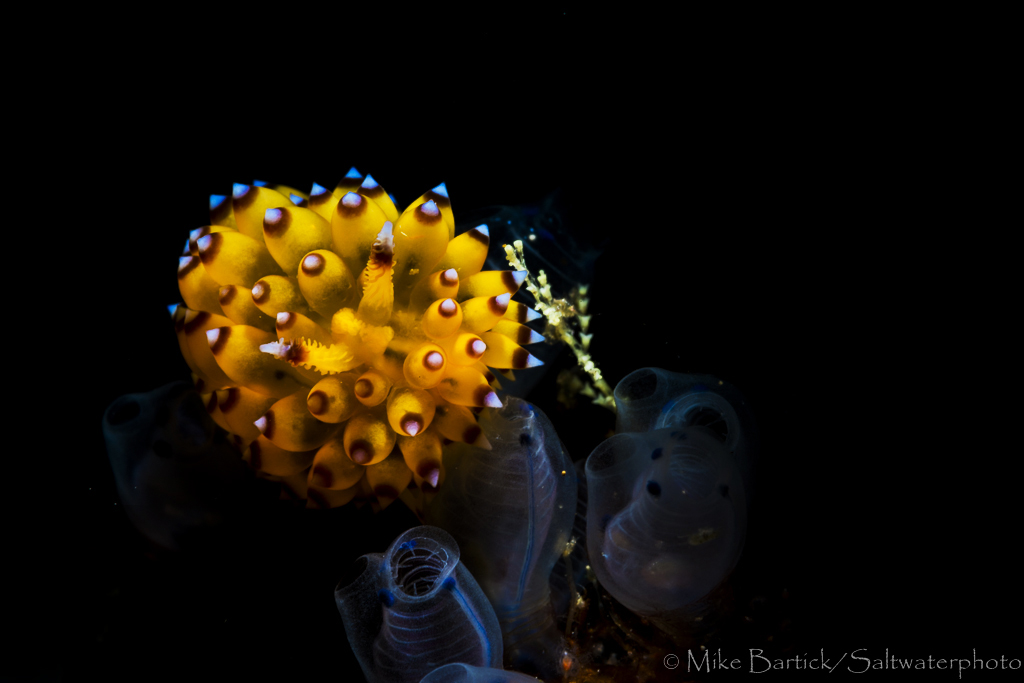
“The Glow” is an effect that I strive for when shooting images of nudibranchs, and the more translucent the subject is, the better the glow will be. Using a snoot really increases that effect.
The softer directional lighting of an articulating snoot works well for nudibranchs. As they tend to move and wrap themselves around objects, the snooted light will illuminate them in different ways.
Standard strobe light creates a similar effect, but the snoot seems to fill the subject with light in a unique manner that compliments a nudibranch’s natural beauty and quickly creates more of an artistic image, elevating the image from ordinary to something a bit more elegant.
When I found the orange and white gymnadoris (below), I quickly changed the tip to the narrow beam and concentrated on lighting just the front portion of that nudibranch. The natural teardrop shape of the notum stubby Rhinophores and flat colors were isolated by the narrow strobe beam creating a special composition that again helped to create something different.
A phylodesmium nudibranch (top right), or solar-powered nudibranch, is a perfect subject in illustrating the glowing effect. I used the wider tip to help capture the mane-like cerata and purple creamy pigments of the solar-powered nudibranch while leaving everything else out.
Anticipating your subject’s movement and positioning your light source, then waiting, is another useful technique for creating something special. (...)
Download the full article ⬇︎
Originally published
X-Ray Mag #60
Indonesia's Gorontalo; Cayman Brac; Antarctica; Brazil's Fernando de Noronha; New Dalarö wreck park in the works in Sweden; Reviewing Poseidon's SE7EN rebreather; The art of bailing out; Idiot buddies; Safety culture; Scuba Confidential; Sensational snoots; Overview of photo editing software; Seacam Academy; Florida's artificial reefs; Erika Pochybova-Johnson portfolio; Plus news and discoveries, equipment and training news, books and media, underwater photo and video equipment, shark tales, whale tales and much more...