

Sharpening Underwater Images in Postproduction
The sharpness of a photograph depends on the camera in use, the lens and the camera settings. Every lens has an optimal range in respect to its sharpness performance.

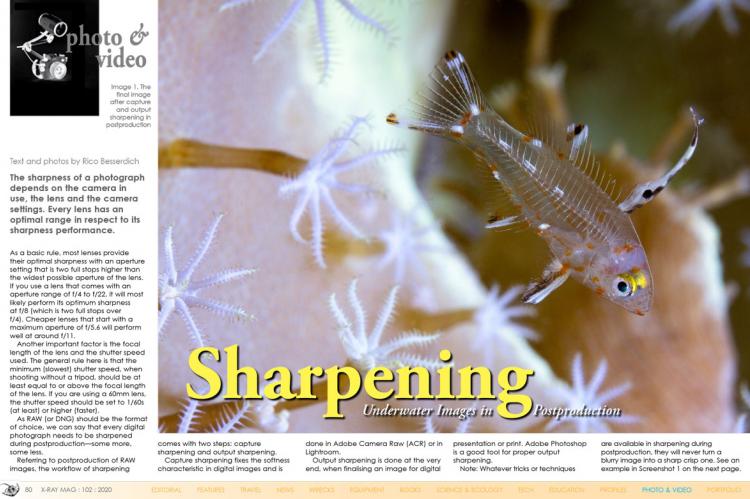
Image 1. The final image after capture and output sharpening in postproduction. Photo by Rico Besserdich.
. The blue arrow points to the shutter speed of 1/60s. Photo by Rico Besserdich.")


. Then, scroll down to Sharpen in the dropdown menu (2). Then, click on Unsharp Mask (3). Photo by Rico Besserdich.")

Tags & Taxonomy
As a basic rule, most lenses provide their optimal sharpness with an aperture setting that is two full stops higher than the widest possible aperture of the lens. If you use a lens that comes with an aperture range of f/4 to f/22, it will most likely perform its optimum sharpness at f/8 (which is two full stops over f/4). Cheaper lenses that start with a maximum aperture of f/5.6 will perform well at around f/11.
Another important factor is the focal length of the lens and the shutter speed used. The general rule here is that the minimum (slowest) shutter speed, when shooting without a tripod, should be at least equal to or above the focal length of the lens. If you are using a 60mm lens, the shutter speed should be set to 1/60s (at least) or higher (faster).
As RAW (or DNG) should be the format of choice, we can say that every digital photograph needs to be sharpened during postproduction—some more, some less.
Referring to postproduction of RAW images, the workflow of sharpening comes with two steps: capture sharpening and output sharpening.
Capture sharpening fixes the softness characteristic in digital images and is done in Adobe Camera Raw (ACR) or in Lightroom.
Output sharpening is done at the very end, when finalising an image for digital presentation or print. Adobe Photoshop is a good tool for proper output sharpening.
Note: Whatever tricks or techniques are available in sharpening during postproduction, they will never turn a blurry image into a sharp crisp one. See an example in Screenshot 1 on the next page.
Whatever I try, this surgeonfish will never become sharp, as my shutter speed of 1/60s was too slow for its fast movements in this shot taken with ambient light.
Unless you intend to work with blurriness as a creative element, it is better not to waste your time with attempts in postproduction to make blurry images into sharp, crisp ones.
Capture sharpening
Now, let’s look for an image that comes already with an acceptable level of sharpness but would benefit—as they all would—from a little extra capture and output sharpening (see Screenshot 2).
This image is opened in ACR. Access the Capture Sharpening Tool via the third icon in the Editor panel (see icon circled in blue).
Before sliding the sliders, here is a quick checklist of things to look for:
• Does the image appear sharp in general?
• Are there areas that are in focus, and if so, are these sharp areas where you want them to be?
If yes, proceed.
In the example shown in Screenshot 2, the best focus is in areas “1” and “2.”
Every time we look at an image to check its details and see what can be done in postproduction, we need to zoom in to 100% (by using the magnifying Zoom Tool) and then move around the image with our mouse (using the Hand Tool) to determine fine but important details (see Screenshot 3).
The RAW sharpening tool in ACR offers us four different sliders for sharpening options. Let’s see what they can do:
Amount: Controls the strength of the sharpening effect. ACR preapplies an amount of 25% to all RAW and DNG images (but not to JPGs or TIFFs). A range of 25 to 45% is just fine.
Radius: Determines the number of pixels around the edge in which the sharpening effect is applied. ACR’s preset here is 1.0, and a range of 0.7 to 1.3 usually works well.
Detail: The higher the value, the more the enhancement of finer details and texture are applied. How much detail depends on the photograph.
Masking: Restricts sharpening in less detailed areas of the image. Hold down the “Alt” key on your keyboard while dragging the slider to see the masked areas in black. We rarely need to sharpen the water or backgrounds, so an amount of 25 to 35 does a fine job here.
In the image example, I have applied the presharpening settings shown in Screenshot 4.
Output sharpening
Now, it is time for the output sharpening—the final step! I opened the image in Photoshop, quickly erased a few spots of backscatter, and applied a curves adjustment layer for final colour adjustments.
A zoomed-in view shows me that the details of the fish now look better, while the background still appears smooth, thanks to the masking option in ACR (see Screenshot 5).
1. Go to Filters > Sharpen > Unsharp Mask (see Screenshot 6).
2. Set the sliders for “Amount” to somewhere between 50 to 90, the “Radius” to 0.7 to 1.5, and the “Threshold” to 3. You have a small preview screen that shows you areas of the image in 100% magnification (which you can select with your mouse). Move around your entire image and check that there are no unwanted halos in bright areas or nasty outlines. If you spot those problems, decrease the values of the “Amount” and “Radius” until the problems disappear. You will see all modifications in real-time (see Screenshot 7).
Note: You can check or uncheck “Preview” to see the changes before and after.
3. Confirm by clicking on “OK,” save the image, and enjoy your awesomely sharp photograph. Congratulations! (See the final image in Image 1 on the first page of this article). ■
Rico Besserdich is a widely published German photographer, journalist and artist based in Turkey. For more information, visit: Maviphoto.com. See his latest book at: Songofsilence.com.
Download the full article ⬇︎
, Coral Gardens, Rooi Els, Cape Town, South Africa")