Mirrorless Macro
— Close-up Underwater Photography with Mirrorless Cameras
Tags & Taxonomy
As I embarked on these articles I did so with quite a strong personal interest as I was looking at accomplishing two objectives. Firstly, I wanted to buy a set of equipment to take with me on some motorcycle trips I was planning, where space was of a premium, but I needed better performance than a high-end compact could offer. Secondly, I wanted to investigate the possibility of using a mirrorless camera as a small back-up rig to my main underwater one—a Nikon D800 in a Nauticam housing.
The D800 is an incredible piece of photographic equipment and is literally the best camera I have ever owned. But it is big and expensive, and so are the lenses that are required to realize its full potential, which means that back-ups are a very costly exercise, and then it dawned on me that the cost of a second D800 body would provide enough working capital to consider a mirrorless rig as a back-up.
So, I began exploring the options and, as detailed in the previous articles, while there is an ever increasing array of mirrorless cameras, when it comes to their suitability for underwater photography, and most importantly the ability to house them, the choices narrow down to two options—the Sony NEX mirrorless cameras and the Micro Four Thirds system from the Panasonic and Olympus alliance.
I opted for the Micro Four Thirds technology because of one basic reason—lenses. Simply stated, there is a much better selection of glass available for the Four Thirds cameras than there is for the Sony NEX.
The Olympus OMD
At the time I started the acquisition of my system in January 2013, the choice of which Micro Four Thirds camera to use was a “no-brainer” and I went for the Olympus OMD-EM5 and have been very pleased with that decision ever since.When it was released in 2012 the OMD went straight to the top of Micro Four Thirds “charts” in terms of both functionality and desirability, and was still there in January.
The other potential contender was the Panasonic GX1, which I decided against because of the lack of a dedicated viewfinder. However, Panasonic just released the GX7, which seems a worthy competitor to the OMD and is well worth checking out.
There is no housing available as yet for the GX7, but you can be pretty sure that it will be supported by Nauticam who have an excellent record of quickly releasing new housings for popular cameras.
Olympus has really done a tremendous job with the OMD and being able to use it both above and below the water alongside the D800 has been a very interesting experience. I tend to think of the D800 as that red Ferrari I have lusted after—an absolutely amazing piece of engineering, but you have to know how to drive it, and you have to have the very best glass that Nikon produces to get the most out of that drive.
The OMD, on the other hand, is a bit like the Nissan Z370, in that it does amazing things in a really neat package, and while it looks a bit like a Porsche, it isn’t one and is nowhere near as expensive either!
So, the real question is what do you really need? Hopefully, this article, and the ones to follow, will help you to answer that question.
My mirrorless rig
Just as the OMD was a “no-brainer” at the time I was buying, so was the selection of a housing, which rapidly boiled down to one option—Nauticam. Hong Kong based Nauticam seems to have come from nowhere over the last few years and now appears to be everywhere. They have done some really smart things to achieve that position, not least of which are the adaptors that allow you to use your existing ports on their housings—probably the biggest impediment to changing housings.Combine that with good overall functionality, a sharp price point, some good marketing and it starts to become clear how they have achieved that position.
After 18 years as a Subal user, I went for a Nauticam housing for my D800, simply because the housing was available at Reef Photo in Florida while I was in the USA, and the Subal I had previously ordered had not turned up yet.
When it came down to which housing for the OMD, I quickly realized that it was either the OEM housing from Olympus, or the Nauticam one, as there was literally nothing else available at that time.
Closer inspection of the functionality and, most importantly, the port options made the Nauticam the only choice.
The big advantage the Micro Four Thirds technology is the excellent selection of lenses available from Panasonic and Olympus, plus the third party manufacturers like Sigma who are joining the mirrorless party. To use some of those lenses underwater, you need the necessary ports and Nauticam already had them.
Underwater at last!
I moved to Bali at the end of 2012 and wanted to establish a “local” site, which was both productive and handy to use, so I can quickly and effectively test new equipment and techniques in a known environment. I chose Secret Bay at Gilimanuk on the north-west tip of the island as that site, as I knew it pretty well from previous dive safaris around Bali, plus it is shore diving in a sheltered area and therefore quite safe for solo diving.
According to my map, it was only 95km from my new home on the south coast, but I subsequently learned that the road up the west coast of Bali is the route all the truckers from Java use after they get off the ferry at Gilimanuk, so a day’s diving at Secret Bay came to involve a seven-hour round road trip!
Traffic aside, Secret Bay and its resident colony of frogfish provided the perfect location to try out my new equipment because once I got orientated, I could return to the same spot within an hour or two with a different lens for the same subject.
Macro lenses
I ended up checking out a total of four “macro” lenses at Secret Bay. Two real macro ones, the Panasonic DG 45mm f2.8 and the Olympus 60mm f2.8, plus two “pseudo” ones that allow close focusing but are not 1:1—the Panasonic 20mm f1.7 and the Sigma EX DN 30mm f2.8.
The Panasonic 20mm and the Sigma were late additions after I realized that their close focusing capability would allow a different perspective on my new best friends in the frogfish colony, and I was pleasantly surprised at the results.
Strobes and lighting
Like most housings these days, the Nauticam OMD housing uses the camera’s “internal” flash to trigger strobes through fiber-optic cables. However, to keep the camera small, Olympus did not provide an in-camera flash, opting instead for a small external unit that connects to the hot shoe and is provided along with the camera when first purchased.
Lesson #1 when preparing the OMD rig is to remember to mount the external flash before putting the camera in the housing! Luckily I always test that the strobe is firing after assembling a housing, otherwise that seven-hour round trip to Secret Bay would have been a very long day the first time I used the camera.
I normally only use one Inon Z240 for macro photography, usually mounted above the port and angled up to edge light the subject and minimize backscatter. Using the fiber-optic cables with the Z240 allowed me to try S-TTL for the first time, and overall, I was quite pleased with it, finding it quite accurate in general.
Viewfinder
Straight out of the box, the OMD and Nauticam housing gives you two options to compose your images—the camera’s electronic viewfinder (EVF) and the LCD. Having learned the value of an additional magnifying viewfinder to augment the camera’s one a long time ago, using the standard one was just a non-starter for me. Time is very limited underwater as it is, and so many things work against you at the best of times. So, performing contortions to see through that little hole is something I can do without—thank you very much.
I was, however, very interested in seeing how the LCD performed, but hedged my bets and forked out for a dedicated 45 degree Nauticam viewfinder and was very glad that I did, as I found the LCD difficult to use. Quite possibly, it was me. But, I really was not happy using it and much preferred the external viewfinder, particularly for vertical compositions. The downside though is that an external viewfinder does add considerably to the overall size and weight of the complete rig.
Ports
Nauticam make a special line of small ports for their mirrorless housings, and the “standard” flat port for the OMD is the one for the Panasonic 45mm macro lens. They also quickly provided a 20mm extension ring when Olympus released their 60mm macro lens so that the standard port can accommodate it.
I was very pleasantly surprised to find that both the Sigma 30mm and the Panasonic 20mm worked perfectly in the standard port, meaning that the 35mm equivalent of 40mm, 60mm, 90mm and 120mm prime lenses can be accommodated with one port and one extension ring!
Lens performance
Overall, I was pleased with the performance of all four lenses underwater, but particularly impressed with that of the Panasonic 45mm and the Olympus 60mm, which were both incredibly sharp. Both the Panasonic 20mm and Sigma 30mm performed well, with the 20mm having the edge on the 30mm, which is not really surprising given the Sigma’s budget price tag.
That said, I would have no hesitation using the Sigma, and for a certain size of creatures, it is just perfect. It focuses down to just under 12 inches (300mm) and is a good choice as a “hunting” lens for sites where you don’t know what to expect.
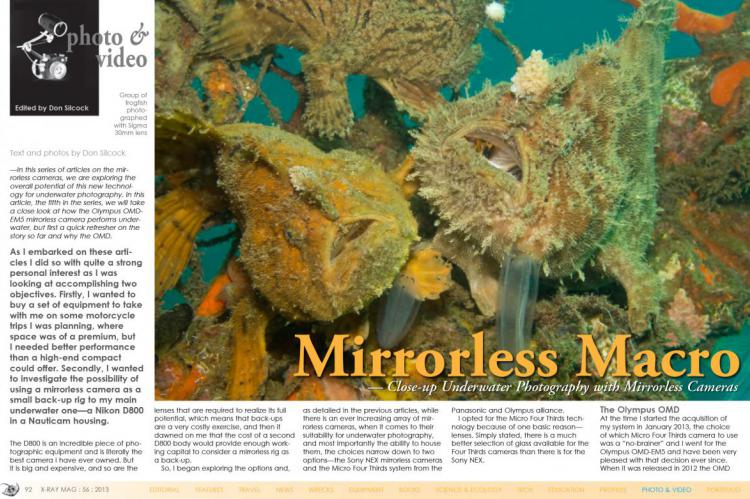
The Panasonic 20mm was excellent for larger subjects, and I was really glad I had it once I learned that the frogfish liked to cuddle up together when the cold incoming tide at Secret Bay made its presence felt. The Panasonic 45mm is co-developed with Leica, so given its lineage and price tag, it should perform, and it certainly did!
I really liked the Olympus 60mm, but given that its equivalent to a 120mm lens in 35mm format, you obviously need some small things to focus on, particularly given the visibility at Secret Bay, which can be challenging at times. However, I just did not find that much small stuff so never really got the chance to nail a killer shot, but I have every confidence that the Olympus would perform superbly in those circumstances.
Conclusion
Having used SLR’s and DSLR’s exclusively for the last 18 years, getting my head around the OMD was a bit challenging at first, but the more I used it underwater, the more it replicated the positive experience I had with the camera on the first bike trip I had taken it on.
The camera’s auto-focus is quick and responsive; Nauticam’s external viewfinder provides a really nice, large and bright canvas to work with; their housing is a nice size; and all the controls are pretty easy to use, if a bit cramped because of the minimal size of the housing.
The RAW images out of the OMD have a decent amount of “headroom” to pull out details from the shadows and highlights, provided you expose optimally, and the overall image quality is very good.
I still have a lot of testing to do with the camera and housing to see how it performs when used for super-macro and wide-angle, but my opinion at this point in time is that it will do very well with the former and reasonably with the latter—but time will tell.
Overall, I am very pleased with my “investment” and looking forward to the four weeks I have coming up in Raja Ampat in October-November when I will use the OMD exclusively for macro and my D800 for wide-angle.
As they say… watch this space. But my general opinion at this point in time is that the mirrorless technology represents an excellent option for anybody getting into underwater photography for the first time. It also represents a very logical upgrade from a compact camera and an excellent option for a DSLR user looking to “rightsize” down from the big and bulky cameras and housings they have probably tired of carrying.
The mirrorless cameras do not have the incredible resolution of the latest DSLR’s, particularly the full-frame ones like the Nikon D800, but do you really need that capability underwater?
My one reservation about the mirrorless technology at this point in time is their dynamic range and capability to do wide-angle underwater photography, but my four weeks in Raja Ampat should allow me to answer that question.
More to follow… ■
Don Silcock is a photo-journalist based in Bali, Indonesia, who specializes in underwater and travel photography. His articles and images can be seen on his websites Indopacificimages.com and Nomadicpixel.com
Download the full article ⬇︎
Originally published
X-Ray Mag #56
Diving Indonesia's Lembeh Strait and Buyat Bay; Mexico's Sea of Cortez; Portugal's artificial reef; Sidemount diving; Hardhat diving; Opening up closed circuit; Interview with Mike Fletcher; Beyond the muck ecology; Sea legs for dive fitness; Wide-macro fisheye photography for critters; Mirrorless macro underwater photography; Sharon Brill portfolio; Plus news and discoveries, equipment and training news, books and media, underwater photo and video equipment, turtle news, shark tales, whale tales and much more...


