Sidemount Tanks: Getting Them to Behave Themselves & Sit Where They Should
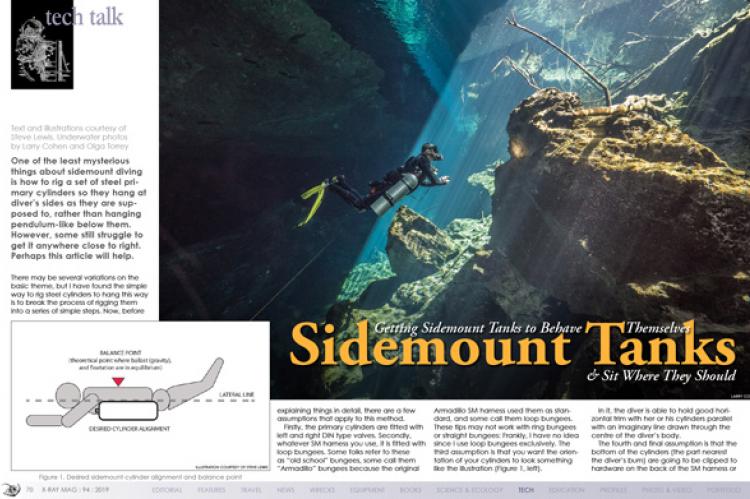
One of the least mysterious things about sidemount diving is how to rig a set of steel primary cylinders so they hang at diver’s sides as they are supposed to, rather than hanging pendulum-like below them. However, some still struggle to get it anywhere close to right. Perhaps this article will help.
Tags & Taxonomy
There may be several variations on the basic theme, but I have found the simple way to rig steel cylinders to hang this way is to break the process of rigging them into a series of simple steps. Now, before explaining things in detail, there are a few assumptions that apply to this method.
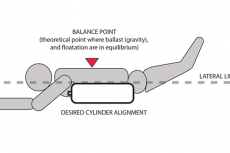
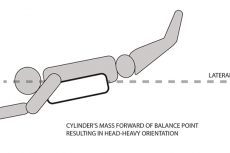
Firstly, the primary cylinders are fitted with left and right DIN type valves. Secondly, whatever SM harness you use, it is fitted with loop bungees. Some folks refer to these as “old school” bungees, some call them “Armadillo” bungees because the original Armadillo SM harness used them as standard, and some call them loop bungees. These tips may not work with ring bungees or straight bungees: Frankly, I have no idea since I use loop bungees exclusively. The third assumption is that you want the orientation of your cylinders to look something like the first illustration (Figure 1).
In it, the diver is able to hold good horizontal trim with her or his cylinders parallel with an imaginary line drawn through the centre of the diver’s body.
The fourth and final assumption is that the bottom of the cylinders (the part nearest the diver’s bum) are going to be clipped to hardware on the back of the SM harness or somewhere close to the diver’s hip.
A fifth point, not really an assumption, is that as long as tanks with opposing valves are used (i.e. left and right-hand valves), whether or not the first stages are worn pointing in towards the diver or pointing out to the environment, is immaterial.
A simple way to approach tank rigging
Start with the notion that there are several things that will affect a tank’s orientation, and therefore, the diver’s orientation also. I find it easiest to get all of these things (let’s call them variables) approximately squared away on dryland and then resolve them one at a time, working in shallow water with an observant buddy or one with a GoPro and time to spare.
The first thing to get sorted is the rigging on both tanks. The clip or boltsnap on the neck of the tank is simply tied onto a small loop of equipment line (3mm braided poly works fine). The loop needs to be long enough to allow it to fit over the valve and handwheel. This clip is a backup for the loop bungee, so its setup and configuration are probably the simplest things about rigging sidemount.
It is the placement of the stern (rear) anchor point in relation to the position of the valve—well, the handwheel on the valve, that is a little more complex. I guess we could start anywhere, but I seem to have the best luck, and the shortest gear-tweaking sessions, starting at this point.
First of all, it helps if we understand what challenge we are trying to “fix” with each variable—or what each affects at least.
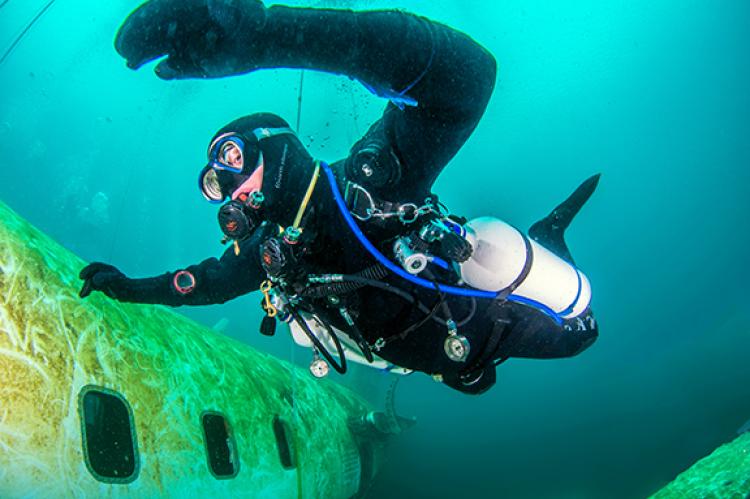
When we dive sidemount, we want our primary cylinders at our sides, with the handwheels pointing away from our bodies, and pointing very slightly down towards the seabed, lake bottom, cave floor, etc. We want the handwheels oriented this way to make it possible for loop bungees to wrap around the handwheel and stay in place. We can do this by manipulating the location of where the cord with a bolt snap on it is connected to the body of the primary cylinder, in such a way that the natural resting position of the handwheel “knob” is out and down.
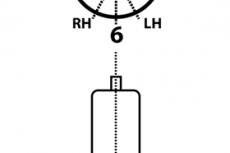
Start off by looking at the cylinder from directly above. Think of the handwheel pointing to 12 o’clock on an imaginary (and analog) clock face. Six o’clock is opposite and at 180 degrees away from it, and we want to mark this line. So, take a straight-edge and a marker and draw a line about 20cm or eight inches long from the bottom of the tank along this six o’clock meridian along the side of each cylinder.
The second illustration (Figure 2) should make this clearer. It shows a dotted line running along the cylinder at 180 degrees from and opposite to the handwheel. The CAM band is shown in red, and the tail (a piece of nylon equipment chord) and the bolt snap or butterfly clip is shown as a solid black line with a small black and red oval at the end of it.
For the vast majority of divers, fixing the stern anchor point at six o’clock (or slightly to the left or right, let’s say, five-thirty to seven-thirty) will greatly help orient the bottle and handwheel correctly. In fact, the best option is to start off with the anchor point at six o’clock for both the left and right-hand cylinders. Fix them in this way, and let’s move on.
Now, note well a couple of provisos. The distance of the CAM band from the bottom of the cylinder is another variable and something we will discuss in a few paragraphs. At this point and as a first step, all we need to do is to find the optimal spot on the clock face to fix the spot where the stern anchor is attached to the cylinder.
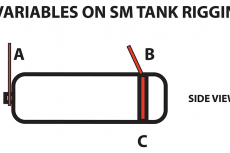
For the time-being, we can put the CAM bands three or four fingers width from the bottom shoulder of our cylinder. Okay, with that done, we are ready to work on the rest of our tank rigging. The third illustration (Figure 3) shows three more primary variables.
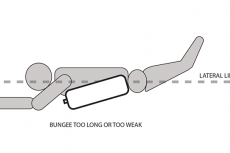
Point A is the length of the loop bungee that wraps around the cylinder’s handwheel, keeping the top of the tank attached to and aligned with the diver’s shoulder. Making it longer or shorter allows a diver to adjust the position of the valve and cylinder’s top with the diver’s chest and armpit.
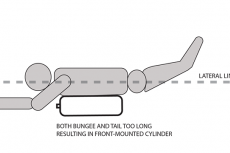
If the loop bungee is too long, the result will be a bottle hanging low in the front and higher in the back. If the bungee is too short, the diver will be unable to reach the tank handwheel, and there is a good chance the valve will dig into his or her armpit. This is both uncomfortable, and potentially hazardous since he or she will most likely not to have the mobility to doff or don the cylinder without help.
Most manufacturers of loop bungees use 6-7mm (1/4-inch) thick shock cord. This thickness is strong enough not to stretch much in water. Bearing this in mind, adjust the length of your loop bungee so that with your arms by your side, and without any tension in it, the end of the loop just pokes out past your bicep. This will need to be fine-tuned for some individuals but it is an okay starting point.
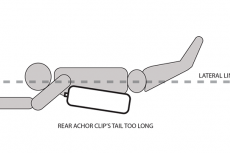
Point B is the length of the tail attaching the cylinder’s bottom to the stern anchor point (either a Dring or “door handle” on the diver’s harness, or on the diver’s waistband). We have already oriented the anchor point to align the handwheels, which is controlled by making this the cylinder to hang parallel to our lateral line. If the tail is too long, the cylinder will be oriented tail down. Too short and it will be difficult to handle, and the tank will sit with its bum pointing up instead of straight back.
The length of this tail WILL need to be adjusted! Do not cut it too short when you first attach it to your CAM band.
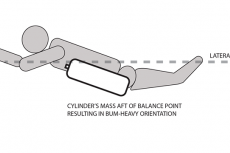
Point C is the location of the CAM band or clamp attaching the stern anchor to the cylinder. This is one of the factors influencing the diver’s trim! Moving the CAM band closer to the top of the cylinder will shift weight towards the diver’s bum, while moving it closer to the bottom will shift weight towards the diver’s shoulders and head. So moving the CAM band helps to trim the diver who is either head or bum down—you move the CAM band towards whichever end of the diver is sinking.
I find it much better and quicker to make small adjustments to one variable at a time, and to get it “right” before moving on. Your mileage may vary, but this method works for me.
A few centimetres of adjustment (an inch or so) can radically alter the trim of a tank or the diver. When you move something, make a note of what you did. I also mark the ”six o’clock line” on my primary cylinders with hash marks every centimetre or so from the bottom of the tank up to about 10cm. This makes fine-tuning my trim easier when I wear thicker or thinner drysuit undies.
There are more subtle issues with getting your sidemount self-squared away (hose routing, for example), but this should help you improve the way you look and feel in the water.
The value of a buddy with a camera who can photograph you underwater, so that you can see exactly what you and your gear look like in the water, cannot be over-stated—make it happen.
Good luck. ■
Steve Lewis is a British diver, instructor, dive industry consultant and author based in Canada. He teaches and lectures at home and abroad. His main focus is dive safety and to make each of us aware of the things that will make us better divers than we are now. His latest book, Staying Alive: Risk Management Techniques for Advanced Scuba Diving, is available through Amazon. For more information, visit: techdivertraining.org or ccrcave.training.
Download the full article ⬇︎
